Connect with us
How to Recover Videos Corrupted During Messenger Transfer
Do you experience video corruption during Messenger transfers? This common technical issue results in unplayable videos and blocks access to content. Faced with a lack of adequate solutions to this pervasive issue, we undertook a detailed study to find a series of successful strategies. In this article, we present the results and methods we devised and provide practical, step-by-step instructions on how to recover and maintain the integrity of your videos during transfer.
Common Video Issues Caused by Corruption During Messenger Transfers
We suggest that you first familiarize yourself with the specific problems that arise from video corruption during Messenger transfers. Here are the typical issues you might encounter:
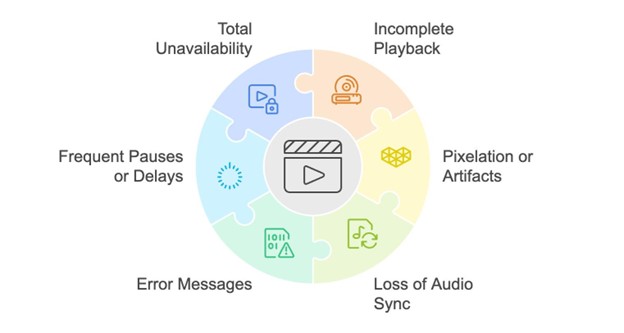
- Firstly, incomplete playback is a common problem in which the video stops abruptly. This often occurs when the file transfer is incomplete, leaving some of the video data missing.
- Secondly, pixelation or artifacts appear in the video. Such distortions typically happen due to errors in data encoding, which can result from hardware malfunctions or unstable transmission channels during the transfer process.
- Thirdly, loss of audio sync with video frames can occur. This issue generally results from interruptions during the transfer, which misalign the audio and video tracks and disrupt the viewing experience.
- Additionally, error messages such as “file format not supported” or “unable to play the file” might display when you try to open the corrupted video. These messages often indicate file system errors or format incompatibilities between the sending and receiving devices.
- Moreover, frequent pauses or delays during video playback can occur if the video file becomes corrupted due to incomplete compression or software conflicts. This problem usually appears as a video that continues to load without progressing.
- Lastly, total unavailability occurs when the video file does not open at all. This severe issue arises when video corruption affects the core file structure, which makes it entirely unreadable.
How to Recover Videos Corrupted During Messenger Transfer
In this section, we demonstrate all the methods that reliably fix videos corrupted during messenger transfers. Some of these solutions might not seem obvious initially, but they have worked reliably in our tests. We primarily repair MP4 file errors from videos downloaded via Telegram. Still, these techniques are also applicable to other video formats, such as AVI, MOV, and MKV, and can be used with different messaging platforms like WhatsApp, Viber, or Facebook.
Note: Before you begin any recovery attempts, confirm that you have a stable internet connection. This step is important as it prevents further interruptions that could lead to additional corruption during recovery.
Method 1: Re-download the Corrupted Video
The easiest method to fix a video that is corrupted during messenger transfer is simply to re-download the file. This solution often resolves issues where corruption results from incomplete download processes or temporary network disruptions. Re-downloading the video can bypass errors that occurred during the initial transfer due to interruptions or fluctuations in the internet connection.
Cases suitable for re-downloading:
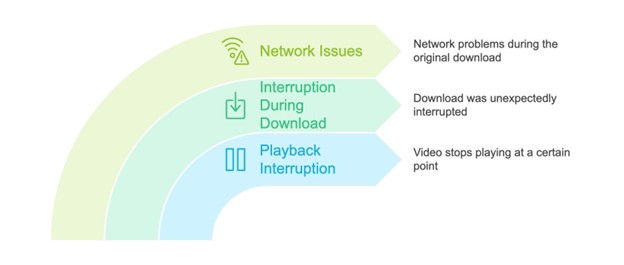
- When the video stops playing at a certain point, but it plays fine up to that moment.
- When the video download was interrupted unexpectedly.
- When network issues were evident during the original download.
How to re-download the corrupted video
1. Check the source from which you download the video to make sure it is still available and reliable.
2. Confirm your internet connection is stable and reliable enough to handle a re-download without interruptions.
3. Go to the source where the video resides and initiate a new download. Choose a different time when network traffic is lower.
4. When prompted, choose a new save location or overwrite the corrupted file.
Pro tip: If you save it as a new file, you can compare the newly downloaded version with the original corrupted one.
5. Play the video in full to check for any signs of corruption. If issues persist, consider alternative methods, which will be discussed later in this guide.
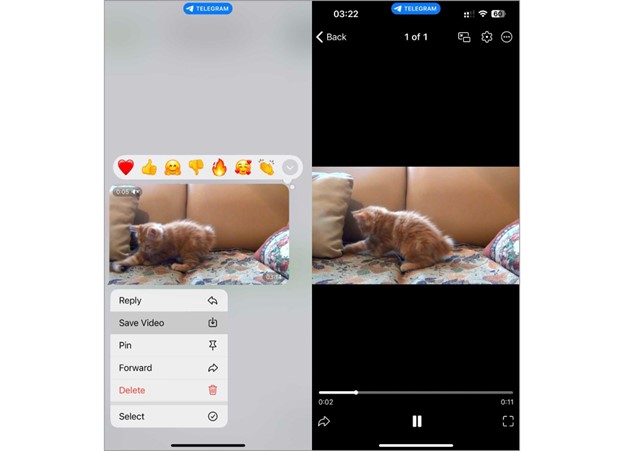
Method 2: Clear Cache and Re-Enter Your Messenger
This method surprised us because we have never associated the messenger’s cache with video corruption. However, during our research, we discovered several instances where users cleared the application’s cache and re-entered the messenger, which resolved issues for them. When you clear the cache, it eliminates temporary data stored by the app, which may include potentially corrupted files or outdated information that might disrupt app performance and file integrity. Re-entering the app can also reestablish connection settings and refresh the app’s operational environment, which further increases the likelihood of resolving video corruption.
Suitable cases for this method:
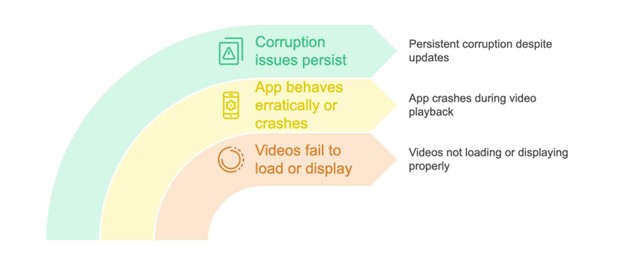
- Videos fail to load or display properly even after a successful download.
- The app behaves erratically or crashes when you attempt to play certain videos.
- Corruption issues persist even after you update the app or the operating system.
Pay attention: We want to note again that we used Telegram for the example, but the instructions for this method will be similar to those for other messengers, so you can easily adapt them.
How to clear cache and re-enter on Telegram:
1. Navigate to the ‘Settings’ menu within the Telegram app.
2. Select the ‘Data and Storage’ option, where cache settings are usually found.
3. Find the option to clear the cache and confirm the action.
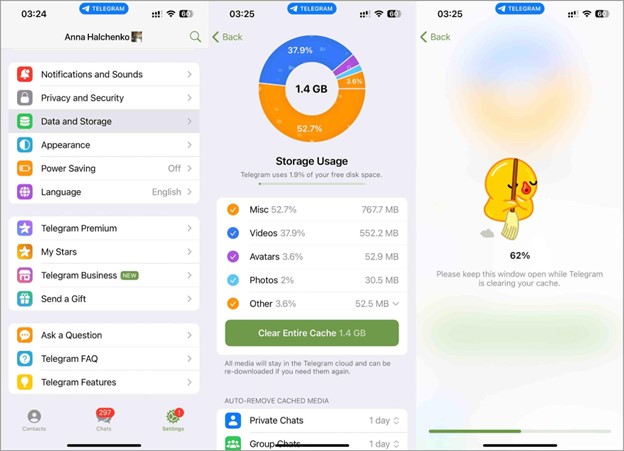
4. Exit your Telegram account from the settings menu.
5. Re-enter your login details and reaccess the account. This refreshes your app’s operational environment.
6. Try to download the corrupted video again to check if the issue has been resolved.
Method 3: Use Specialized Video Repair Tools
If the above methods do not fix the damaged video, it becomes necessary to work directly with the file. For this purpose, specialized video repair tools are needed. Among the available options, we recommend Clever Online Video Repair for its speed and convenience—it operates online, so no installation is necessary. Moreover, this tool is completely free and supports many popular video file types, including MP4, MOV, and AVI. This accessibility sets it apart from other tools that often require payment and have limited trial periods.
Suitable cases to use Clever Online Video Repair:
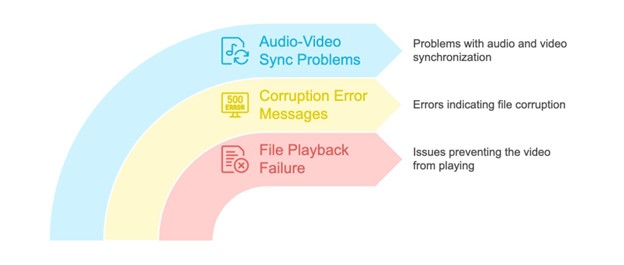
- When the video file fails to play.
- When the video displays an error message indicating corruption.
- When audio and video tracks are out of sync or missing sections.
Important! Clever Online Video Repair requires the corrupted video and a reference video. The reference should originate from the same device and share the same settings as the damaged video to confirm the tool assesses and corrects the file.
1. Open your web browser and navigate to the Clover Online Video Repair site.
2. In the website’s upload area, find the option to select your сorrupted video and upload it.
Pro tip: You may describe the problems encountered with the video and any conditions that may have led to its corruption. If you choose not to provide details, you can proceed directly to the next step.
3. From the site's dropdown menus, select the brand and model of the device used to record the video.
Pro tip: If you’re unsure, you can select ‘Unknown device.’
4. Upload a reference video recorded in the same environment as the corrupted file. This will help the repair tool understand the correct settings.
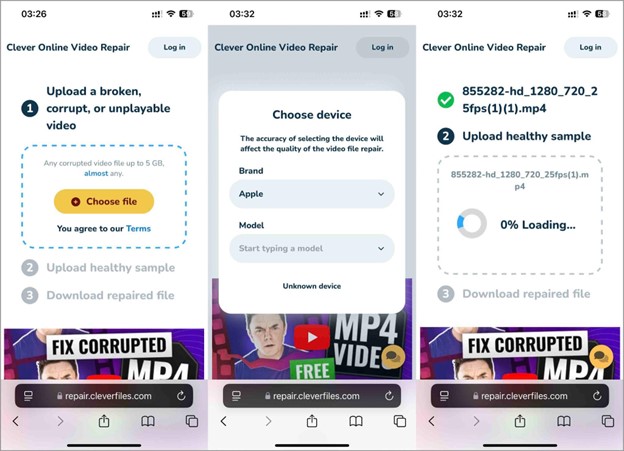
5. To initiate the repair process, you must complete your site registration. You can use your Google, Apple, or email account. Once you’ve registered, the repair process begins automatically.
6. Once the repair is complete, you can preview screenshots of the repaired video to assess the quality.
7. Click ‘Download’ to save the repaired video onto your device.
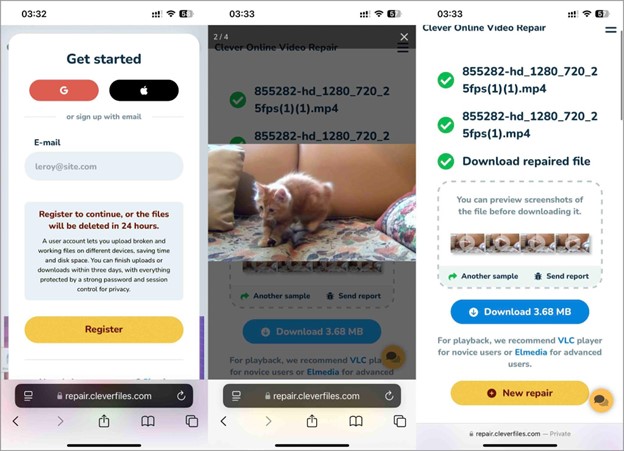
Note: The repaired video remains stored in your personal account for only three days after the repair is completed. It is automatically deleted afterward, so we advise you to download it promptly to avoid losing access.
Method 4: Use Command-Line Video Repair Tools
What do you do if you don’t have a reference video? During our analysis of video corruption during Messenger transfers, we could not find any additional convenient free software that could successfully repair the video without a reference file. Therefore, we decided to use FFmpeg so you do not have to purchase expensive software.
FFmpeg provides a complete, cross-platform solution to record, convert, and stream audio and video. It includes libavcodec, the leading audio/video codec library that many video repair and conversion tools use.
Applicable cases for FFmpeg:
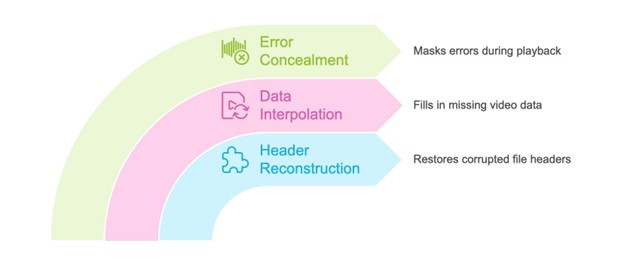
- Reconstruct headers for files where this information has become corrupted.
- It can interpolate missing data in video streams to make files playable.
- FFmpeg provides error concealment features that help mask corrupted data during video playback.
Pay attention: All the methods described above can be used directly from the phone; however, FFmpeg requires a computer.
Note: FFmpeg requires a thorough knowledge of the commands that will be used. Therefore, we advise you to familiarize yourself with the additional materials and documentation available on the FFmpeg website before you attempt any repairs.
On Windows:
1. Download the FFmpeg build from FFmpeg.org.
2. Extract the files to a folder, e.g., C:\FFmpeg.
3. Add C:\FFmpeg\bin to the system path to use FFmpeg from the command line.
On Mac:
1. Open the Terminal.
2. Install Homebrew by pasting the following command: /bin/bash -c "$(curl -fsSL https://raw.githubusercontent.com/Homebrew/install/HEAD/install.sh)".
3. Once Homebrew is installed, type brew install ffmpeg to install FFmpeg.
4. Open your command prompt (Windows) or terminal (Mac). Navigate to the directory which contains the video file.
5. Execute the command: ffmpeg -i corrupted_video.mp4 -c copy repaired_video.mp4. This command copies the video and audio streams into a new container, which might ignore minor corruptions.

6. Check the repaired video for any persisting issues. If problems remain, modify the FFmpeg commands or use additional parameters that might address specific corruption issues.
Conclusion
In this article, we addressed the issue of video corruption that occurs during messenger transfers. This problem affects access to content and complicates communication. We presented several methods to recover corrupted videos, from simple re-downloads to more advanced solutions that involve specialized software and command-line tools.
In conclusion, there are ways to fix video corruption. The techniques described in this guide can restore your videos to proper functionality. We recommend that you try all of these methods to find the one that suits your needs.


